Tuesday, March 24, 2009

PANELS ARE IN!


We installed 4 panels last weekend with help from my dad, brother, some friends at work and a technician from Solar Services Inc. The panels are 4'-0" wide x 8'-0" long. Because of the way water moves through the panels and the size of our roof, we chose to orient them vertically. One thing we tried to avoid was a lot of exposed plumbing. The panels are AE-32 model solar hot water panels. (http://www.aetsolar.com/literature/AE_Collector_Brochure.pdf) Our current hot water demands require about 2.5 collectors but we installed 4 because of the radiant floor system that we mentioned in an earlier post. Our goal is to: 1. get all our domestic hot water from solar and 2. Use the extra hot water that is generated to heat the concrete slab in the addition. We want to use the system as actively as possible.

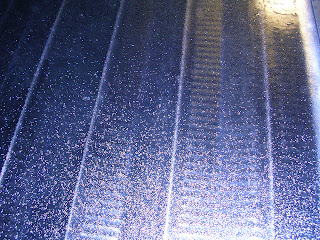
The panels are constructed from copper fin plates (absorbers) connected to small copper tubes. The heat from the fin plates is transferred to the tubes and ultimately the liquid inside. (In our case domestic water) In the photo above you can see the tubes running vertically up the panel. The photo below shows a detail of a fin plate. I was surprised at how little water is actually inside the panel.
The first step was to get them on the roof. My brother PJ and Carmine, a friend from work helped us lift them into place. The specifications say this panel is supposed to weigh 113 lbs but the awkwardness factor made it seem heavier.

The first panel was aligned and anchored to a roof rafter below.
The remaining panels are anchored to adjoining rafters and connected to each other via 1" copper couplings. You can also see the top portion of the anchorage clip (on the left panel) that holds the panel to the roof. These clips fit into an extrusion profile on the panel and get lag bolted to the roof. Because of the metal roof profile we had to use rafters that occurred within the 'lows' (or flat spots) of our roof. This is why shingle roofs are much easier to work with.

We had plenty of advice from the ground crew. For a while we had a large hump between the 2nd and 3rd panels; they were quick to point this out! Carmine works on the hot water return line. The piping will come out of the top right corner of the panel array and into the roof soffit. Eventually it will enter the house and return to the utility room where the tank and pumps will be located.

Cold water in (bottom left) and hot water out (top right).


Thomas was fine tuning the panels and soldering them all together.


Thomas had more patience than we could have asked for today. Not only did he have to work with the homeowner, the homeowner is an architect who asks a lot of questions...... a lot of questions! The panels are in!!!

Thursday, March 19, 2009

Panel no.1


PICKING UP THE SOLAR PANELS!


We plan to install the solar hot water panels this weekend and have to pick them up from the shop today. I have a short meeting with the owner to work out some last minute details before loading up Monster Truck.
The panels are 4' x 8' and weigh about 113 lbs ea. The model number is AET-ae-32 and made by a company called Alternate Energy Technologies, LLC. In addition to the tax credits I received with these panels, I was told that I will be able to sell alternative energy credits. Once I understand the details I will post my findings on this site. If this is true I may be able to reduce my payback period by several years.

WINDOW TRIM


With nicer weather on tap for the weekend, we set up shop outside to build window frames. After several variations we finally ended up with a suitable frame that worked with all the windows;1" x 2" on edge, mitered corners with a sill that's 1/2 " deeper and set on a 5 degree slope. We were able to use standard brick molding, however we turned it on edge so the 1" dimension was facing out. After the frames were together we caulked the screw heads and put a coat of paint on.


This picture reminds me that I have to put those last 5 screws in the roof! Wires need to go too.

South side of house along driveway.

Tuesday, March 3, 2009

High of 28, Low of 19

It is cold in my house this week, real cold.........I feel like Clark Grizwald stuck in the attic except I am blogging instead of watching reel to reels.

JIGS


More rain this week so we are working inside building window frames. This is a simple jig that allows us to make these frames fast. Jigs are great because they represent the ideas involved in the process of making objects and not just the object itself. There are entire books on the subject of jigs and many craftsman are equally as proud of their jigs as they are of their products.

Miles of Seamless Gutters

That's the name of the company and they are not kidding! This machine is from Australia and can extrude a 6 1/2", half round gutter......well forever if you had the room and the material. They just pull up their truck, hit the power switch and squirt out a big gutter.


Awesome!!!!!!

The soffit beam

Because of the loft area on the south side of this room we were not able to use our standard collar ties to resist the roof thrust. Instead we have created a 'beam' that is turned on its side to resist the lateral forces of the roof. This 'beam' is fixed at both ends and tied back to each rafter to form a truss of sorts that will keep the exterior wall to the north from deforming. We located the beam in line with an existing soffit from the house. When we are done it should look like a continuation of this existing soffit. (It should......famous last words!)


The electrical raceway

We had rain over the last few days so we framed around our the electrical wires located in the front of the house. You might remember these wires from the demo pictures (seems like so long ago!). They run out to the breaker box located in the closet on the front wall.


Front porch pavers installed

Last weekend David and his dad installed the brick pavers on the front porch. We are expecting cold weather over the next few days and will have to insulate the mortar. We are leaving a small gap around the perimeter to be filled with a silicon caulk. Finishing the porch is a great benchmark for our project. This is one of the first 'finished' products in the project. It is starting to look like a house again.

Collar Ties

We installed the collar tie in the back of the house. This collar tie will span between rafters on the inside and outside of the house. The photo below shows the tie penetrating through the rough framing of the exterior wall. We originally designed this connection to occur within the cavity of the roof vent flue. Now this will be exposed with glass above and below. I am interested to see how it reacts to extreme temperature differentials during the summer and winter months.

Flashing for the pavers


We installed flashing the other night in preparation for the brick pavers. The precast concrete caps have been mortared into place. Some spalling occurred on the 3/4" chamfer so we will have smooth it out with the grinder later.

Pavers!


#57 Granite


We have gravel down in most of the driveway so I don't have to wear my boots to the car every morning. The graded lawn and gravel driveway are giving hints of a finished product. (Is that grass in the corner...)